VMware Aria Operations for Applications (formerly known as Tanzu Observability by Wavefront) supports sharing links, sharing access, and embedding charts.
You can
- Share a link to a dashboard or chart so someone else can see what’s going on.
- Share access to a dashboard if the user is not in a group that has access to that specific dashboard.
- Embed an interactive chart in another product or on a Website.
Video: Sharing Content
This short video shows how you can share content by using some of the methods described below. Note that this video was created in 2021 and some of the information in it might have changed. It also uses the 2021 version of the UI.
Share a Link with a Share Icon
The easiest way to share a link is using a share icon. Use a share icon to share a link to what you’re seeing right now (NON-LIVE display).
Share a Link to a Dashboard
To share a link to a dashboard, use the share icon in the bottom right quadrant of the page.
![]()
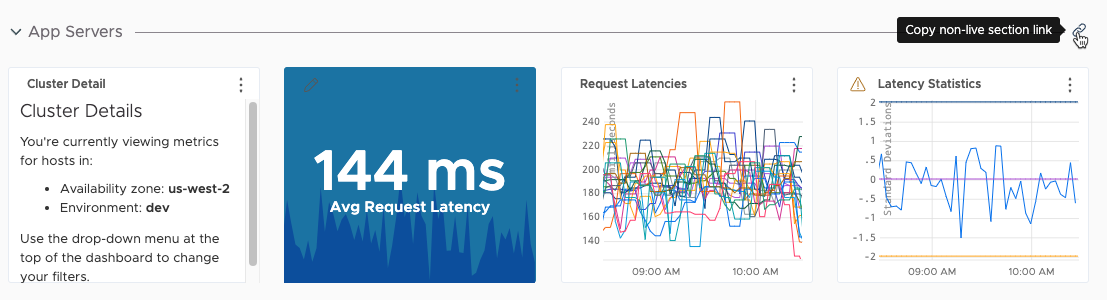
Share a Link to a Dashboard Section
To share a link to a dashboard section, use the link icon next to the section.
Share a Link with the Share Dialog
You can share dashboards and charts with other authorized users of your environment. We support two options:
- Live view – Changes as the dashboard or alert changes.
- Non-live view – Links to a snapshot of what you’re looking at right now.
To share a dashboard using a link
-
Navigate to the dashboard and click the Share Dashboard icon.

-
Select the Shared Links tab and click the button to copy the link you want to share:
Share link to the LIVE dashboard display The link recipient sees the live display of the current dashboard. If the dashboard changed after you sent the link, the recipient sees those changes. Share link to the NON-LIVE dashboard display The link recipient will see, at any time, what you see. For example, if you share a non-live link, and the recipient opens the links 3 hours later, that link shows the state of the system 3 hours ago. Even if you make changes, the link recipient only sees the snapshot of the dashboard at the time you copied the link.
Share Access to Dashboards or Alerts
If the access control for an individual dashboard or alert has been set so that access is blocked by default, the following users can share access with other users and groups:
- The dashboard creator
- Super Admin
- Any user who has View & Modify access because someone already shared access to the dashboard with that user.
The process is very similar for dashboards and for alerts.
To grant or revoke dashboard access:
-
Navigate to the dashboard and click the Share Dashboard icon.
- Click the Accounts & Groups tab.
- To grant access:
- Start typing an account or a group name in the View Dashboard or View & Modify Dashboard text box.
- Select the group or user to give access.
- To revoke access, delete the group or user.
- Click Update.
Embed a Chart in Other UIs and Allow or Restrict Access
You can embed an interactive chart in another product or on a Website. You must have the Chart Embedding permission to create embedded charts.
Embed a Chart in Other UIs
- Open the chart that you want to embed in the chart editor.
- Navigate to the dashboard in which your chart is included, click the ellipsis icon, and select Edit.
- Click the ellipsis icon of the chart that you want to embed, and select Edit.
-
Click the embed icon (
<\>).
-
Click Create. A dialog containing an HTML code snippet like the one below displays:
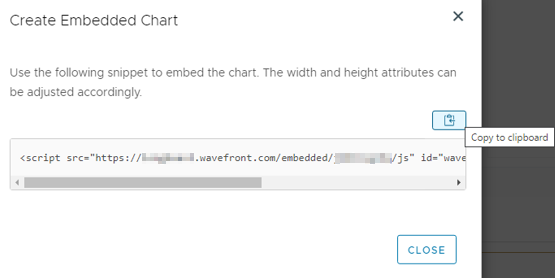
- Copy the snippet by clicking the Copy to clipboard icon, and paste it into the desired location. You can adjust the
widthandheightparameters.
Allow or Deny Access to Embedded Charts
You can apply access policies and deny or allow access to the embedded charts by using our REST API. The Access Policy controls which IP addresses can access the embedded charts and doesn’t affect any other URLs or other functionality. Learn more about the categories in the REST API.
When you apply an access policy rule, take in mind the following:
- When you apply an
Access Policyrule, it may take up to 10 minutes to take effect. - If you want to remove the rules at a later point, you can set the policy to
{"policyRules": []}”. - Only IPv4 subnet masks are supported.
- You should put any DENY rules at the end.
The following snippet provides with access a single IPv4 address, namely 192.168.1.2. The IPv4 addresses that you provide when you apply Access Policy rules, must be in CIDR format to match an IP address range. All other IP addresses will be denied.
When a request comes in, the rules are checked in the order in which you entered them and exited as soon as a matching rule is found. You must specify all of your ALLOW rules first and the DENY rules at the end to catch any additional IP addresses.
{
 "policyRules": [
 {
   "name": "allow-single-ip",
   "description": "Allow a single IP address.",
   "action": "ALLOW",
   "subnet": "192.168.1.2/32"
 },
 {
   "name": "default-deny",
   "description": "Deny All.",
   "action": "DENY",
   "subnet": "0.0.0.0/0"
 }
 ]
}