Amazon Web Services (AWS) is a collection of cloud-computing services that provide an on-demand computing platform. The Amazon Web Services integration allows you to ingest metrics directly from AWS.
You can use the Amazon Web Services integration for initial setup, but additional steps might be needed for some of the services. This page gives an overview.
Basics
The AWS integration ingests data from many AWS services and products including:
- CloudWatch – retrieves AWS metric and dimension data. Includes some metrics for Amazon Relational Database (RDS).
- CloudTrail – retrieves EC2 event information and creates VMware Aria Operations for Applications (formerly known as Tanzu Observability by Wavefront) System events that represent the AWS events.
- AWS Metrics+ – retrieves additional metrics using AWS APIs other than CloudWatch. Data include EBS volume data and EC2 instance metadata like tags. You can investigate billing data and the number of reserved instances. Be sure to enable AWS+ metrics because it allows VMware Aria Operations for Applications to optimize its use of CloudWatch, and saves money on CloudWatch calls as a result.
Establish a Trust Relationship
Adding an AWS integration requires establishing a trust relationship between Amazon and VMware Aria Operations for Applications by specifying account information. You have to do that only once, and you have 2 options:
After you’ve set up the integration, you can examine metrics from all AWS services that you subscribe to from the VMware Aria Operations for Applications GUI. The integration includes a predefined dashboard for each service. You can clone and modify the system dashboards, or create your own custom dashboard.
AWS Dashboards
If you set up an Amazon Web Services integration, we install the AWS overview dashboards such as Summary, Pricing, and Billing and the AWS service-specific dashboards: EC2, ECS, ELB, DynamoDB, Lambda, Redshift, and so on. All AWS dashboards have a tag ~integration.aws.<service>. For example: ~integration.aws.ec2, ~integration.aws.lambda, etc.
On the All Dashboards page, system dashboards are indicated with the VMware Aria Operations for Applications logo icon next to the dashboard name.
Giving Access to Your AWS Account
Data flows from AWS only if the account has the required access. You have several options:
| ReadOnlyAccess policy (most services) | In most cases, it makes sense to give the ReadOnlyAccess policy to the Amazon account. |
| Access to Service Limit metrics | If you want to collect Service Limit metrics:
|
| Create IAM policy to specify limited access | Explicitly specify the access settings in a custom IAM policy, as discussed in Giving Limited Access. |
Give Read-Only Access to Your Amazon Account and Get the Role ARN
To grant Operations for Applications with read-only access to your Amazon account, you need to provide an account ID and external ID. While the account ID is a constant value - the ID to which you want to grant access to your resources, the external ID is not a constant value. The external ID is a secret identifier that is known by you and VMware Aria Operations for Applications (the third-party). The external ID is time-sensitive and regenerated each time you reopen the AWS Integration setup page, and you cannot reuse it.
For information about external IDs and how they are used in AWS, see How to Use External ID When Granting Access to Your AWS Resources.
- Log in to your AWS account.
- Search for the IAM (AWS Identity and Access Management) service and click it.
- Under Access management on the left, click Roles.
- Click Create role.
- Click the AWS account tile, and select the Another AWS account radio button.
- Enter the account information:
- Account ID - The identifier of the account to which you want to grant access.
To get the account ID:
- Navigate to your service instance.
- Click Integrations on the toolbar and click the Amazon Web Services integration tile.
- Click the Setup tab and click the How to get Role ARN link.
- Copy the Account ID displayed in the instructions.
-
Select the option Require external ID and provide the external ID.
Copy the External ID displayed in the instructions on the Amazon Web Services integration Setup page (in your VMware Aria Operations for Applications GUI) and paste it into the text box in the AWS UI.
- Account ID - The identifier of the account to which you want to grant access.
To get the account ID:
- Click Next.
-
On the Add permissions screen, search for, and select the ReadOnlyAccess check box.
You get many results when you search for ReadOnlyAccess. Scroll down and browse through the pages until you find ReadOnlyAccess or click the Policy name column name to get the results sorted in reverse alphabetical order.
- Click Next.
- In the Role name text box, provide a unique name of the role and click Create role.
- On the Roles page, click the newly created role.
- Copy the ARN value, so that you can use it when you configure your AWS integration.
Giving Limited Access
Instead of giving global read-only access, you can give more limited access.
The required permissions for limited access, shown in the table below, are sufficient for monitoring your AWS services. You need to include the whole list of minimum required services and permissions as shown in the example snippet.
| Integration | Description | Required Permissions |
|---|---|---|
| CloudWatch | Retrieves AWS metric and dimension data. | ListMetrics GetMetric* |
| CloudTrail |
Retrieves EC2 event information and creates VMware Aria Operations for Applications System events. | List and Get permissions on the S3 bucket where the logs are delivered. |
| AWS Metrics+ | Retrieves additional metrics, tags and other metadata using AWS APIs.
|
ec2:DescribeVolumes ec2:DescribeInstances ec2:DescribeReservedInstances rds:Describe* sqs:ListQueue* sqs:GetQueue* dynamodb:ListTables dynamodb:DescribeTable eks:Describe* eks:List* es:ListDomainNames es:DescribeElasticsearchDomain es:listTags iam:ListAccountAliases |
| AWS Metrics+ Service Limit Metrics |
Retrieves Trusted Advisor service limit metrics using AWS APIs. Requires at least a Business Level AWS Support plan. | support:DescribeTrustedAdvisorChecks support:RefreshTrustedAdvisorCheck support:DescribeTrustedAdvisorCheckResult |
Create IAM Policy to Specify Limited Access
You can explicitly specify the access permissions in a custom IAM policy, as shown in the following example snippet.
Note: This snippet contains the minimum required list of services and permissions. If you delete a service and its permission from the list, some of the integration functionality might get impacted.
{
    "Version": "2012-10-17",
    "Statement": [
        {
            "Action": [
                "cloudwatch:GetMetric*",
                "cloudwatch:ListMetrics",
                "ec2:Describe*",
                "s3:List*",
                "s3:Get*",
                "rds:Describe*",
                "sqs:ListQueue*",
                "sqs:GetQueue*",
                "dynamodb:ListTables",
                "dynamodb:DescribeTable",
                "eks:Describe*",
                "eks:List*",
                "support:DescribeTrustedAdvisorChecks",
                "support:RefreshTrustedAdvisorCheck",
                "support:DescribeTrustedAdvisorCheckResult",
                "es:ListDomainNames",
                "es:DescribeElasticsearchDomain",
                "es:ListTags",
                "iam:ListAccountAliases"
            ],
            "Effect": "Allow",
            "Resource": "*"
        }
    ]
}
Managing an AWS Integration
When you set up an AWS integration, you associate it with your Role ARN and configure a CloudWatch, an AWS Metrics+, and, optionally, a CloudTrail integration. After you set up an AWS integration, you can edit, disable, enable, delete, and register more CloudWatch, AWS Metrics+, or CloudTrail integrations associated with the same Role ARN.
You can also add and manage AWS integrations by using our REST API.
Set up an AWS Integration
To set up an AWS integration, you must have a Role ARN handy.
- Log in to your service instance and click Integrations on the toolbar.
- In the Featured section, click the Amazon Web Services tile.
- Click the Setup tab, and click Add Integration.
- Configure the integration properties:
- Name - Name to identify the integration.
- Role ARN - The Role ARN from your Amazon account.
- (Optional) If you want to configure a CloudTrail integration, click Show Advanced Options.
-
Bucket Name - Enter the S3 bucket containing CloudTrail logs.
In your AWS account, go to CloudTrail >Trails to see the bucket name.
-
Prefix - A log file prefix specified when you created the CloudTrail.
The default prefix is
AWSLogs. If you use a custom prefix, you must put it here without using a forward slash at the end of the prefix, i.e. a trailing slash. -
CloudTrail Region - AWS Region where the CloudTrail logs reside.
-
- Click Register.
The AWS integration, which includes a CloudWatch, an AWS Metrics+, and, optionally, a CloudTrail integration, are added to the Amazon Web Services integrations list on the Setup tab.
- If you want to configure allow lists and refresh rate for the CloudWatch ingestion, click the CloudWatch link in the Types column and follow the instructions in Configuring CloudWatch Data Ingestion.
- If you want to disable the ingestion of support service limit metrics (also known as service quotas), that is, the metrics with the namespace
aws.limits.*, click the AWS Metrics+ link in the Types column and follow the instructions in Disable Service Limit Metrics Ingestion.
Register Additional AWS Services to an AWS Integration
After you set up the AWS integration with a Role ARN, you can additionally register more CloudWatch, AWS Metrics+, or CloudTrail integrations associated with the same role ARN.
- In your service instance (
https://<your_instance>.wavefront.com), click Integrations on the toolbar. - In the Featured section, click the Amazon Web Services tile.
- Click the Setup tab.
- Click the Advanced link.
- On the Cloud Integrations page, click Add Cloud Integration > Add Amazon Web Services and select an option:
-
To register an AWS Metrics+ service, select Register AWS Metrics+, and configure the following integration properties:
- Name – Name to identify the integration.
- Role ARN – Select the Role ARN from your Amazon account.
- Service Limit Metrics – Disable or enable the ingestion of support service limit metrics (also known as service quotas), that is, the metrics with the namespace
aws.limits.*. You can later edit this setting, if necessary.
-
To register a CloudTrail service, select Register CloudTrail, and configure the following integration properties:
- Name - Name to identify the integration.
- Role ARN – Select the Role ARN from your Amazon account.
-
Bucket Name – The S3 bucket that contains CloudTrail logs.
In AWS, go to CloudTrail >Trails to see the bucket name.
-
Prefix – A log file prefix specified when you created the CloudTrail.
The default prefix is
AWSLogs. If you use a custom prefix, you must put it here without using a forward slash at the end of the prefix, i.e. a trailing slash. - Region – AWS Region where the CloudTrail logs reside.
-
To register a CloudWatch service, select Register CloudWatch, and configure the following integration properties:
- Name – Name to identify the integration.
- Role ARN – Select the Role ARN from your Amazon account.
- Allow Lists and Service Refresh Rate – see Configuring CloudWatch Data Ingestion.
-
- Click Register. The selected integrations are created and added to the Cloud Integrations list.
Enable and Disable AWS Integrations
We automatically disable integrations that are experiencing errors due to invalid credentials. To enable an integration after the credential has been corrected or to manually disable an integration:
- In your service instance (
https://<your_instance>.wavefront.com), click Integrations on the toolbar. - In the Featured section, click the Amazon Web Services tile.
- Click the Setup tab.
- Click the Advanced link.
- In the row that contains the integration that you want to enable or disable, click the ellipsis icon, and select Enable or Disable.
Delete AWS Integrations
You can delete an AWS integration if you no longer need it:
- In your service instance (
https://<your_instance>.wavefront.com), click Integrations on the toolbar. - In the Featured section, click the Amazon Web Services tile.
- Click the Setup tab.
- Click the Advanced link.
- In the row that contains the integration that you want to delete, click the ellipsis icon, and select Delete.
- Confirm the deletion.
New metrics will no longer be fetched from the AWS integration that you deleted. However, existing metrics are not affected.
Viewing AWS Metrics
You can view AWS metrics by selecting Browse > Metrics and searching for metrics beginning with aws.:
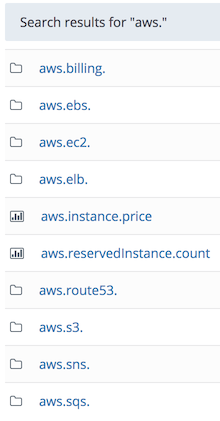
You can drill into the folder for a specific service and click a metric to navigate to a chart that displays that set of data. For example, clicking the folder aws.ec2., then the metric aws.ec2.cpuutilization, and then refining the query by the Region point tag and the topk function yields the following chart:

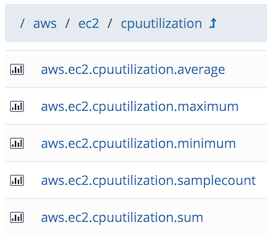
AWS Aggregate Metrics
All AWS metrics return the following aggregate metrics: average, maximum, minimum, sample count, and sum. To view the aggregate metrics,
-
Search for a specific metric, for example
aws.ec2.cpuutilization: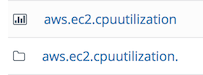
-
Click the metric folder, for example
aws.ec2.cpuutilization., to display the aggregate metrics: